
Spokes for Poor Folks
You have just finished framing up your WW I or Golden Age airplane, and it looks so good you decide to go all the way with wire-spoked wheels. After checking prices of the labor-intensive wire wheels, you think seriously of making your own.
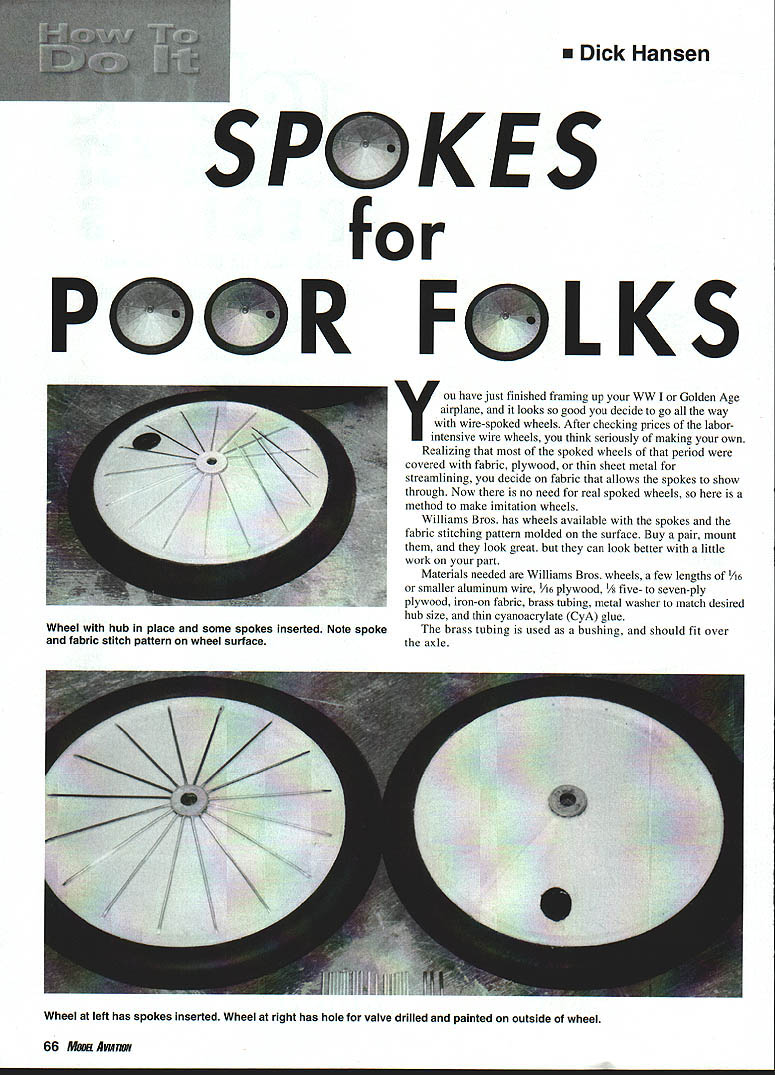
Realizing that most of the spoked wheels of that period were covered with fabric, plywood, or thin sheet metal for streamlining, you decide on fabric that allows the spokes to show through. Now there is no need for real spoked wheels, so here is a method to make imitation wheels.
Williams Bros. has wheels available with the spokes and the fabric stitching pattern molded on the surface. Buy a pair, mount them, and they look great, but they can look better with a little work on your part.
Materials
- Williams Bros. wheels
- A few lengths of 1/16" or smaller aluminum wire
- 1/16" plywood
- 1/8" five- to seven-ply plywood
- Iron-on fabric
- Brass tubing (used as a bushing; should fit over the axle)
- Metal washer to match desired hub size
- Thin cyanoacrylate (CyA) glue
- Double-stick tape
- Sandpaper
- Snips
- Hard balsa or Popsicle stick (for a fabric-pressing tool)
- RC-56 or white glue
- Nitrate dope and paint
Preparation of the Wheel and Bushing
- Drill out the wheel holes to accept the brass tube. Cut off the tubing so at least 1/8" protrudes from the wheel surface on both sides to accept the hubs you will make.
- Cut four hub discs slightly larger than the metal washer and stick them together with double-stick tape; include the washer in this stack.
- Drill a hole through the center of the stack to fit the brass bushing, then sand down the stack to match the washer.
- Mark the spoke positions on the four hubs, using the wheel as a guide. Drill the spoke holes no more than 1/16" deep.
- Remove the washer, separate the hubs, and glue them in place over the extended bushings with the spoke holes lined up with the molded spokes on the wheel.
Adding Valve Stem and Rim Details
- Drill a hole in the wheel between the spokes near the rim for the valve stem, and paint the interior black. (Most valve openings were on the outside of the wheel.)
- Cut the 1/16" plywood to form a ring around each valve opening and glue it in place.
Installing Spokes
- Drill holes near the rim at the end of each spoke to receive the aluminum wire.
- Cut the aluminum wire to length by inserting it in the hub and cutting with snips just slightly past the hole near the rim.
- Bend the end of the spoke down a few degrees and insert into the hole, then press the spoke down against the wheel. No glue is needed to hold the spokes in place.
Covering with Fabric
- Cut four iron-on fabric discs 1/8" oversize from where the rim meets the tire.
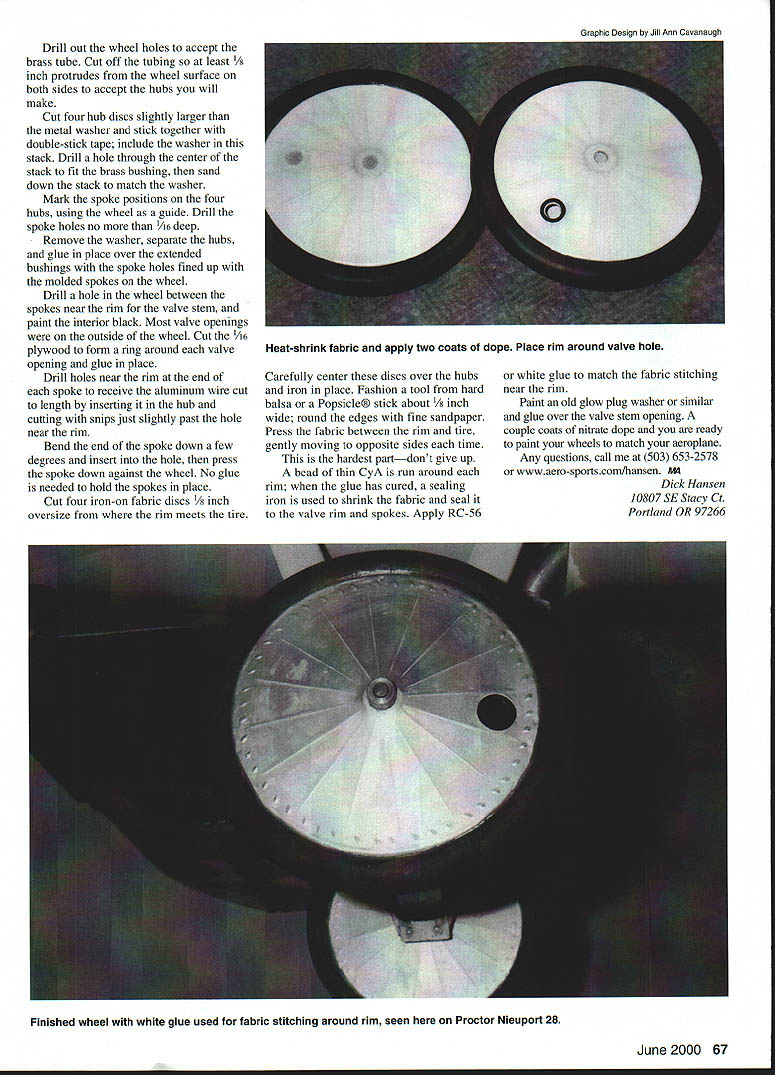
- Carefully center these discs over the hubs and iron in place.
- Fashion a tool from hard balsa or a Popsicle stick about 1/8" wide; round the edges with fine sandpaper.
- Press the fabric between the rim and tire, gently moving to opposite sides each time. This is the hardest part—don’t give up.
- Run a bead of thin CyA around each rim; when the glue has cured, use a sealing iron to shrink the fabric and seal it to the valve rim and spokes.
- Apply RC-56 or white glue to match the fabric stitching near the rim.
Finishing
- Paint an old glow plug washer or similar and glue it over the valve stem opening.
- Apply a couple coats of nitrate dope and you are ready to paint your wheels to match your aeroplane.
Any questions, call me at (503) 653-2578 or www.aero-sports.com/hansen.
— Dick Hansen 10807 SE Stacy Ct. Portland OR 97266
Transcribed from original scans by AI. Minor OCR errors may remain.

