
Plane Talk: Stevens Aero G480 V2 Electric RC Kit
Jack J. Joseph jjoseph52@q.com
Introduction
Why would anyone build a model airplane when there are so many great ARFs? My theory is that some of us have build genes in our DNA that developed while we were constructing our first kit. The gene may remain dormant for a long time, but one day it bursts forth, and the desire to build a kit is so strong that we cannot resist it.
My build gene burst forth during the last throes of summer. I needed a kit!
All of my models must fit two criteria: be electric powered and fit comfortably in my Honda Civic’s trunk. To find an aircraft with those traits, I could have searched the catalogs that come unannounced in my mailbox or surfed through a multitude of e-stores. But to save time, I went to Stevens AeroModel’s website.
The company engineers fine, small, electric-powered kits. I scrolled through the various offerings and found the G480 V2 (Re-Groove) 3-D/Aerobatics/park flyer. It has a 45-inch wingspan and is perfect for my car’s trunk. I bought it and two rolls of lightweight covering.
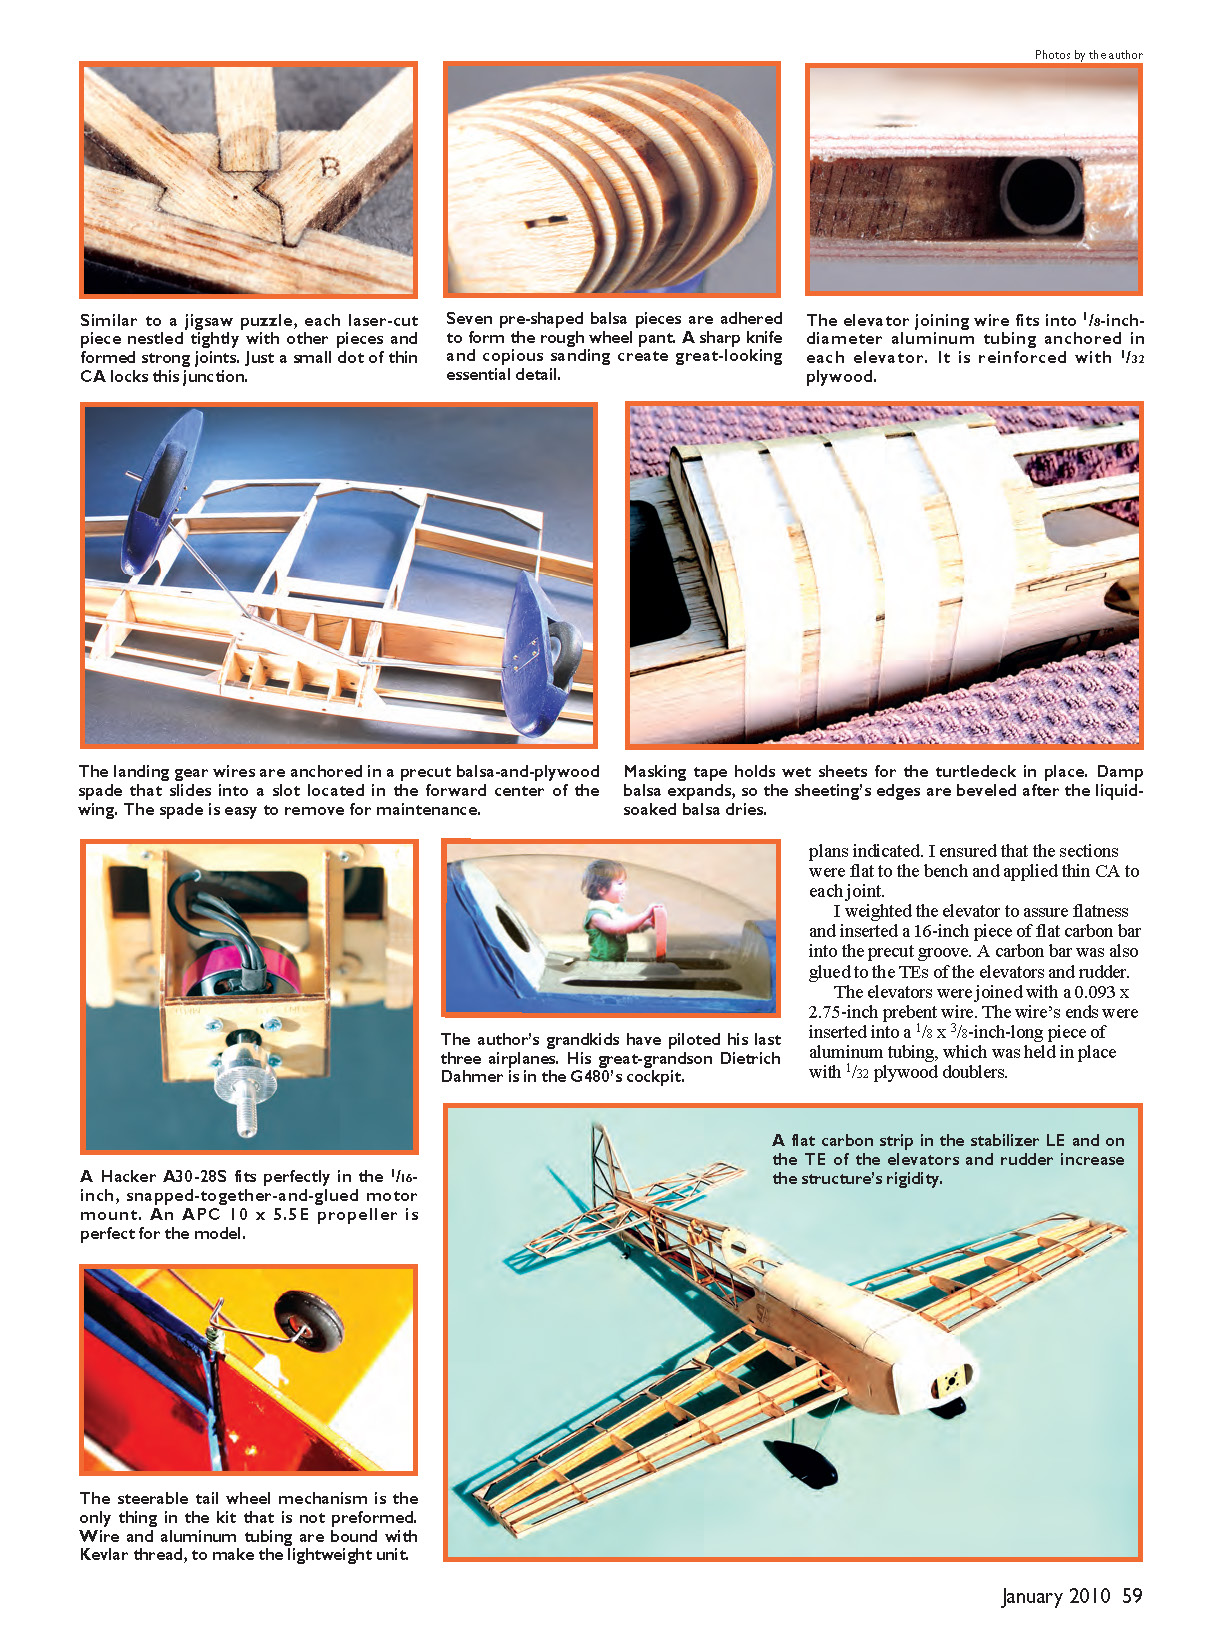
A cardboard box arrived at my door a week later. All of the building materials were packed in plastic envelopes; the balsa/plywood sheets were in one, the larger hardware was in another, and the third package contained the small hardware. It was extremely neat.
There were two pages of rolled, computer-drawn plans and a 43-page construction manual (six pages of which were devoted to Scott M. Stoops’ The Pilot’s Guide to Mastering Radio Controlled Flight), replete with more than 100 construction photographs.
I checked the contents of the packages against the list in the manual; nothing was missing. I bought the other necessary items, such as glue, #11 blades, and other products, at the local hobby shop. I was ready to appease my “desire-to-build gene.”
Kit contents and documentation
- Laser-cut balsa and plywood parts
- Hardware packs (large and small)
- Two pages of rolled plans
- 43-page construction manual with >100 photos
- Precut grooves for carbon reinforcement and hinge slots
Construction overview
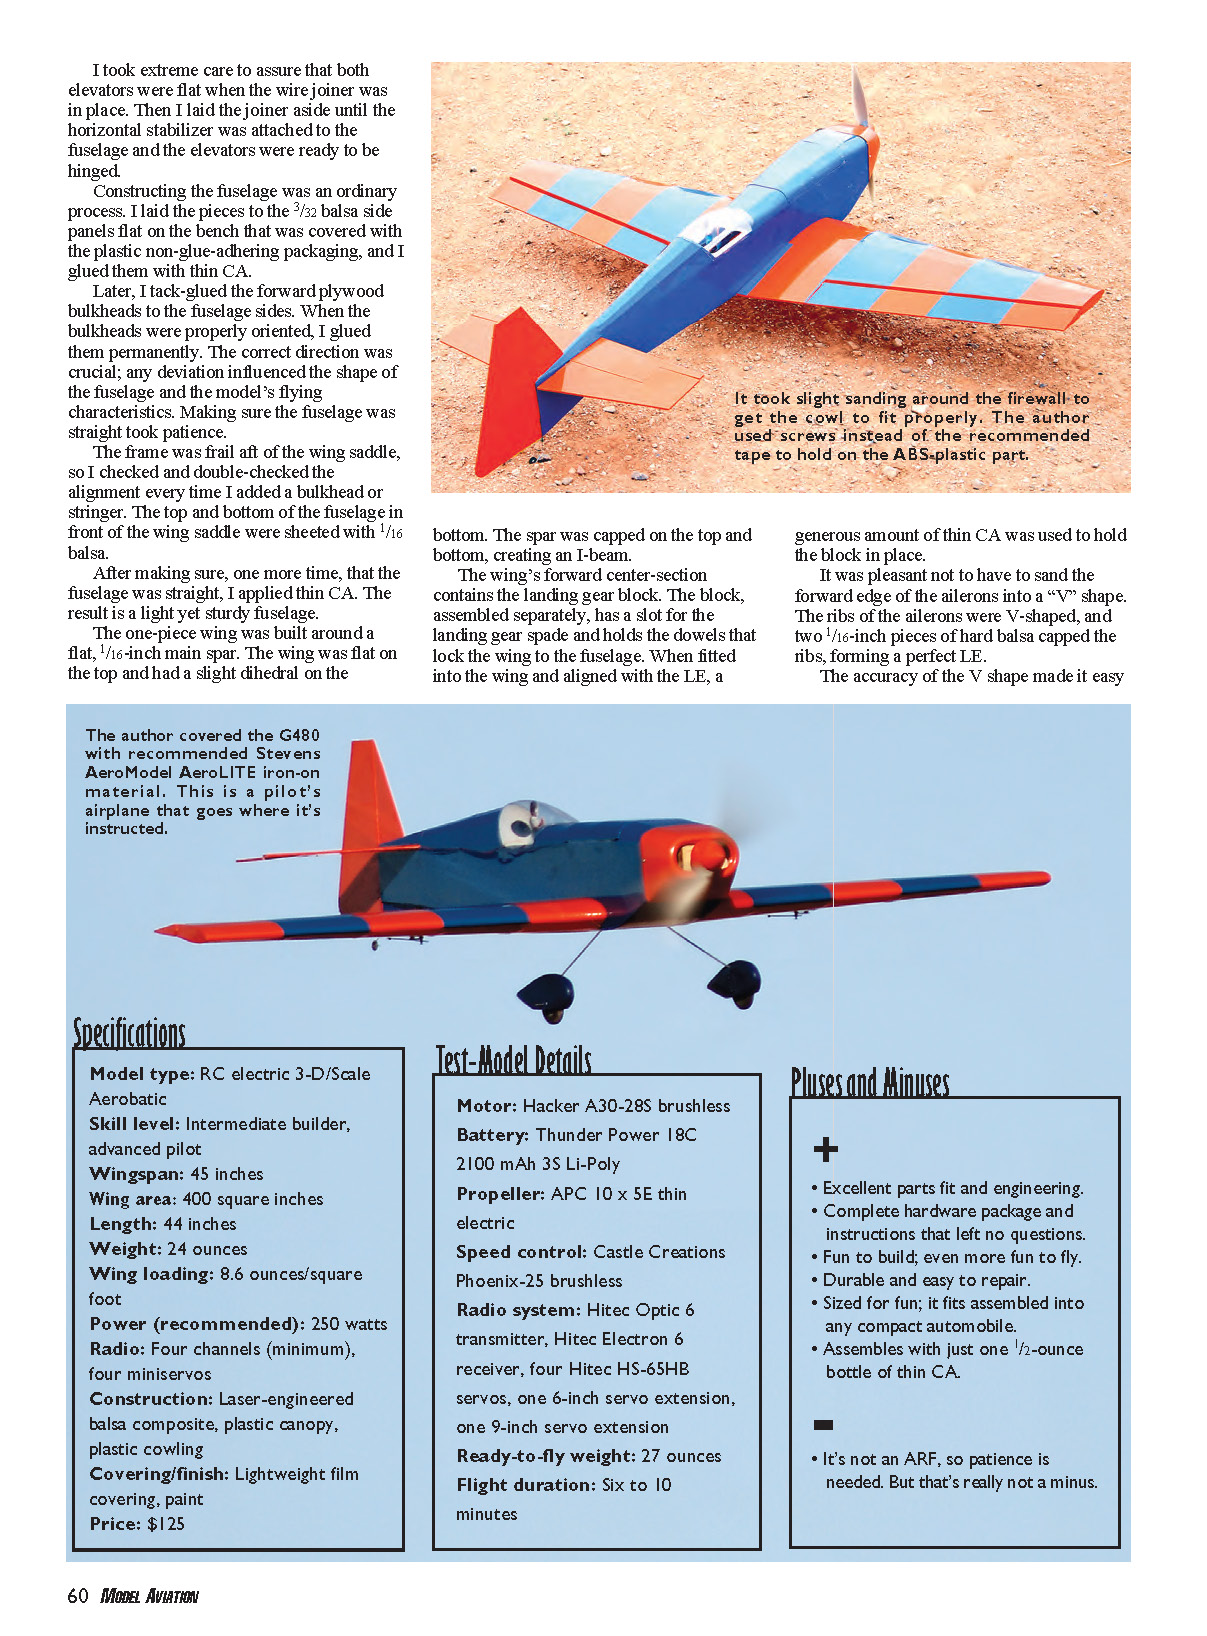
The G480 V2 is my second Stevens AeroModel kit, and I enjoy fitting the precise laser-cut parts together. It is sort of like putting together a jigsaw puzzle; this aircraft has roughly 200 pieces.
It is unnecessary to pin the parts to the plans. Everything is exact; once in place, the components stay attached without glue. The key to this type of construction is making sure that the assembly is aligned before applying glue. The entire frame—tail assembly, wing, and fuselage—was bonded with thin CA.
I followed the manual’s assembly instructions, laying out and reviewing the plans containing the tail sections and covering the plans with the plastic bag that the wood sheets arrived in; that protects the plans and CA doesn’t stick to it.
#### Tail assembly I removed the various balsa parts for the stabilizers, elevators, and rudder from their sheets and placed them together as the plans indicated. I ensured that the sections were flat on the bench and applied thin CA to each joint. I weighted the elevator to assure flatness and inserted a 16-inch piece of flat carbon bar into the precut groove. A carbon bar was also glued to the trailing edges of the elevators and rudder.
The elevators were joined with a 0.093 x 2.75-inch prebent wire. The wire’s ends were inserted into a 1/8 x 3/8-inch piece of aluminum tubing, which was held in place with 1/32-inch plywood doublers. Similar to a jigsaw puzzle, each laser-cut piece nestled tightly with other pieces and formed strong joints. Just a small dot of thin CA locks each junction.
Seven pre-shaped balsa pieces are adhered to form the rough wheel pant. A sharp knife and copious sanding create great-looking, essential detail.
The steerable tailwheel mechanism is the only thing in the kit that is not preformed. Wire and aluminum tubing are bound with Kevlar thread to make the lightweight unit.
#### Fuselage Constructing the fuselage was an ordinary process. I laid the 3/32-inch balsa side panels flat on the bench (covered with the plastic non-glue-adhering packaging), and I glued them with thin CA.
Later, I tack-glued the forward plywood bulkheads to the fuselage sides. When the bulkheads were properly oriented, I glued them permanently. The correct direction was crucial; any deviation influenced the shape of the fuselage and the model’s flying characteristics. Making sure the fuselage was straight took patience.
The frame was frail aft of the wing saddle, so I checked and double-checked the alignment every time I added a bulkhead or stringer. The top and bottom of the fuselage in front of the wing saddle were sheeted with 1/16-inch balsa. After making sure, one more time, that the fuselage was straight, I applied thin CA. The result is a light yet sturdy fuselage.
#### Wing The one-piece wing was built around a flat, 1/16-inch main spar. The wing was flat on the top and had a slight dihedral on the bottom. The spar was capped on the top and bottom, creating an I-beam.
The wing’s forward center section contains the landing gear block. The block, assembled separately, has a slot for the landing gear spade and holds the dowels that lock the wing to the fuselage. When fitted into the wing and aligned with the leading edge, a generous amount of thin CA was used to hold the block in place.
It was pleasant not to have to sand the forward edge of the ailerons into a “V” shape. The ribs of the ailerons were V-shaped, and two 1/16-inch pieces of hard balsa capped the ribs, forming a perfect leading edge.
The accuracy of the V shape made it easy to cut a slot for the hinges that were later inserted into precut slots in the wing trailing edge. I suspect that this type of construction is stronger than a one-piece spar, because the V is built from several pieces glued together. Other kit makers should pick up this design—assuming that they can duplicate it legally. It eliminates dusty sanding, eyeballing the edge while trying to get it straight, and hoping you cut the hinge slots in the sharp edge of a manually created V.
#### Landing gear The landing gear assembly called for accuracy. I laid the wires on a flat surface to determine whether or not they were straight. When held securely to the board, one end of a wire did not lay flat and I adjusted it with pliers until it did.
The wires were slipped into a precut balsa form. That was sandwiched between 1/32-inch plywood, creating what Stevens AeroModel calls a "spade." I wicked a large amount of CA through the assembly.
I put the wheels in place to determine if they toed in or out too much; both looked good to me. I rolled the wheels across the board, and they moved fine.
I inserted the spade into the channel in the wing’s forward center section. The fit was tight, but slight sanding allowed me to easily press the spade in place.
For all practical purposes, the landing gear was finished. The only step left was to build and fit the wheel covers to the wire legs—no plastic wheel covers on this airplane!
I had to assemble seven balsa plates, adhere them, and carve them as shown on the plans. It was a labor-intensive job, but when the covers (wheel pants) were finished, they looked great and fit perfectly on the wires, over the wheels.
#### Power and electronics A Hacker A30-28S fits perfectly in the 1/16-inch motor mount that snapped together and was flooded with thin CA. An APC 10 x 5.5E propeller is perfect for the model. The motor mounts fit into the slots in the firewall and were secured with thin CA.
Mounting the motor, other electronics, and control linkages completed my G480. It was time to fly!
Finishing: painting and covering
The balsa covers (wheel pants) were painted with DecoArt’s Multi-Purpose Sealer. I applied the color coat—Delta Creative’s acrylic paint—followed by a protective coat of Minwax clear semigloss Polycrylic. I rubbed each coat with fine steel wool, resulting in a smooth, glowing surface. I used these same materials and procedures on the cowl.
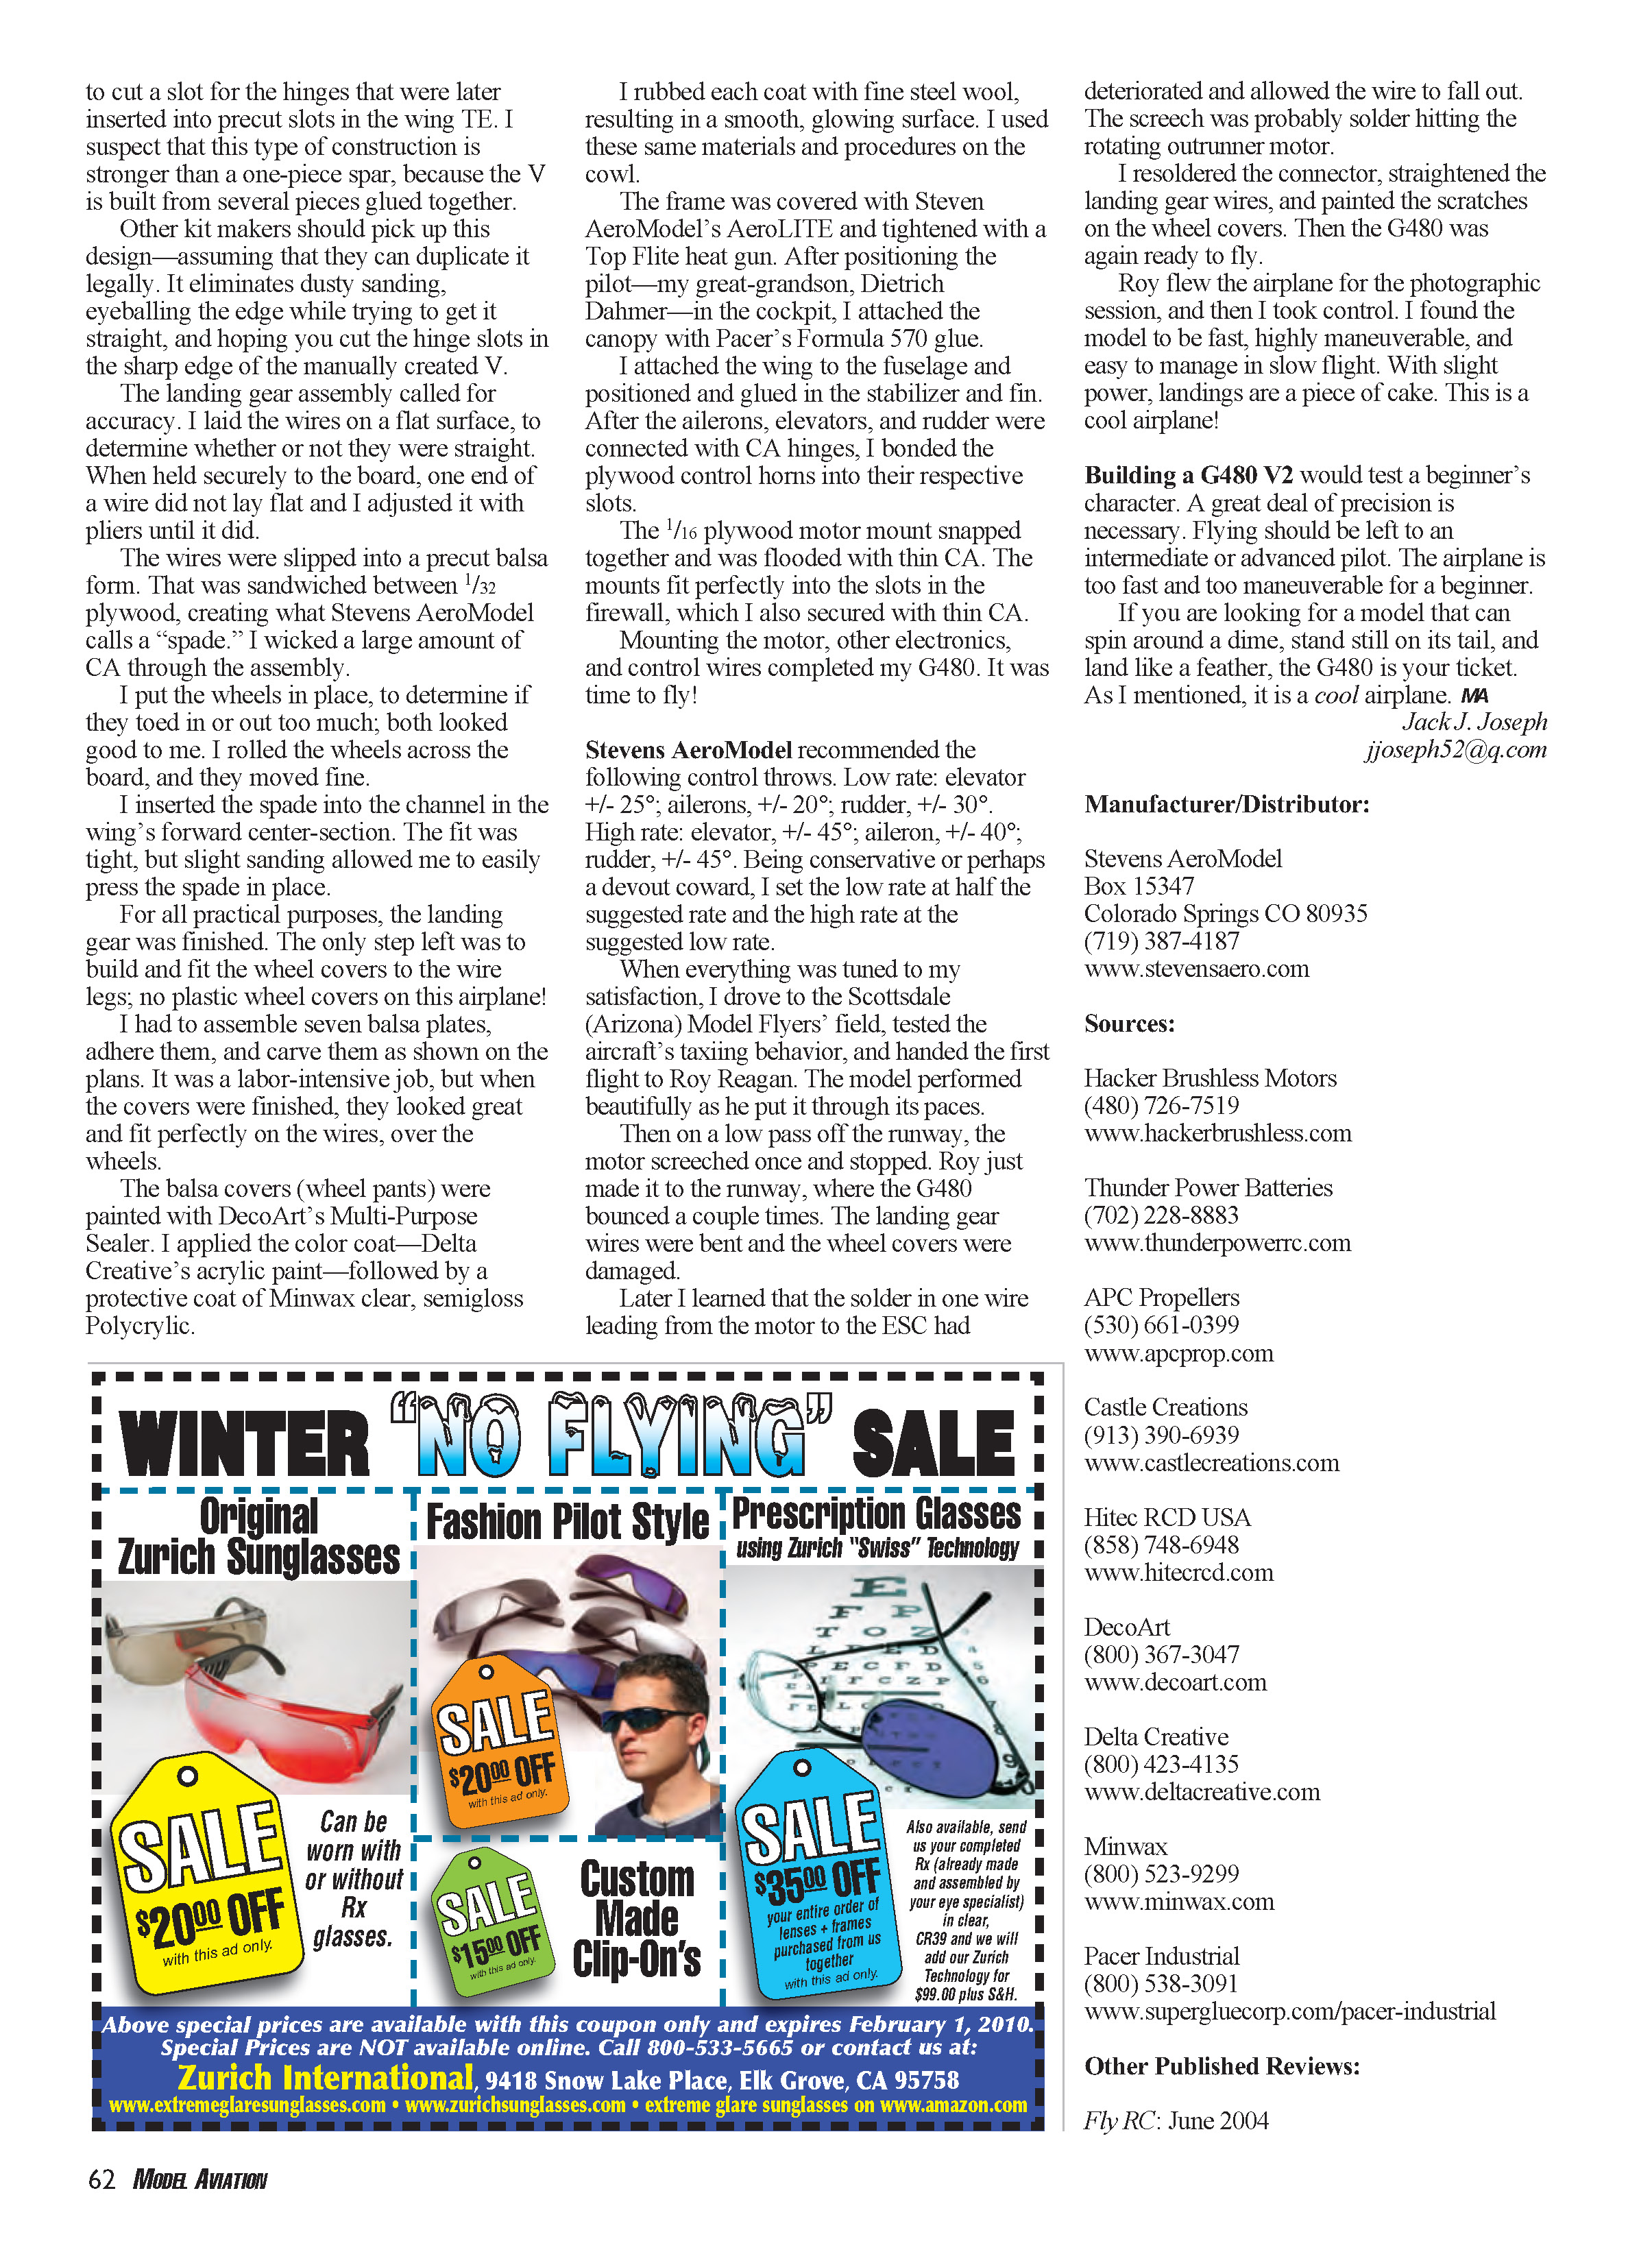
The frame was covered with Stevens AeroModel’s AeroLITE and tightened with a Top Flite heat gun. After positioning the pilot—my great-grandson, Dietrich Dahmer—in the cockpit, I attached the canopy with Pacer’s Formula 570 glue.
I attached the wing to the fuselage and positioned and glued in the stabilizer and fin. After the ailerons, elevators, and rudder were connected with CA hinges, I bonded the plywood control horns into their respective slots.
Flying impressions and a hiccup
Stevens AeroModel recommended the following control throws:
- Low rate:
- Elevator: ±25°
- Ailerons: ±20°
- Rudder: ±30°
- High rate:
- Elevator: ±45°
- Ailerons: ±40°
- Rudder: ±45°
Being conservative (or perhaps a devout coward), I set the low rate at half the suggested rate and the high rate at the suggested low rate.
When everything was tuned to my satisfaction, I drove to the Scottsdale (Arizona) Model Flyers’ field, tested the aircraft’s taxiing behavior, and handed the first flight to Roy Reagan. The model performed beautifully as he put it through its paces.
Then, on a low pass off the runway, the motor screeched once and stopped. Roy just made it to the runway, where the G480 bounced a couple times. The landing gear wires were bent and the wheel covers were damaged.
Later I learned that the solder in one wire leading from the motor to the ESC had deteriorated and allowed the wire to fall out. The screech was probably solder hitting the rotating outrunner motor.
I resoldered the connector, straightened the landing gear wires, and painted the scratches on the wheel covers. Then the G480 was again ready to fly.
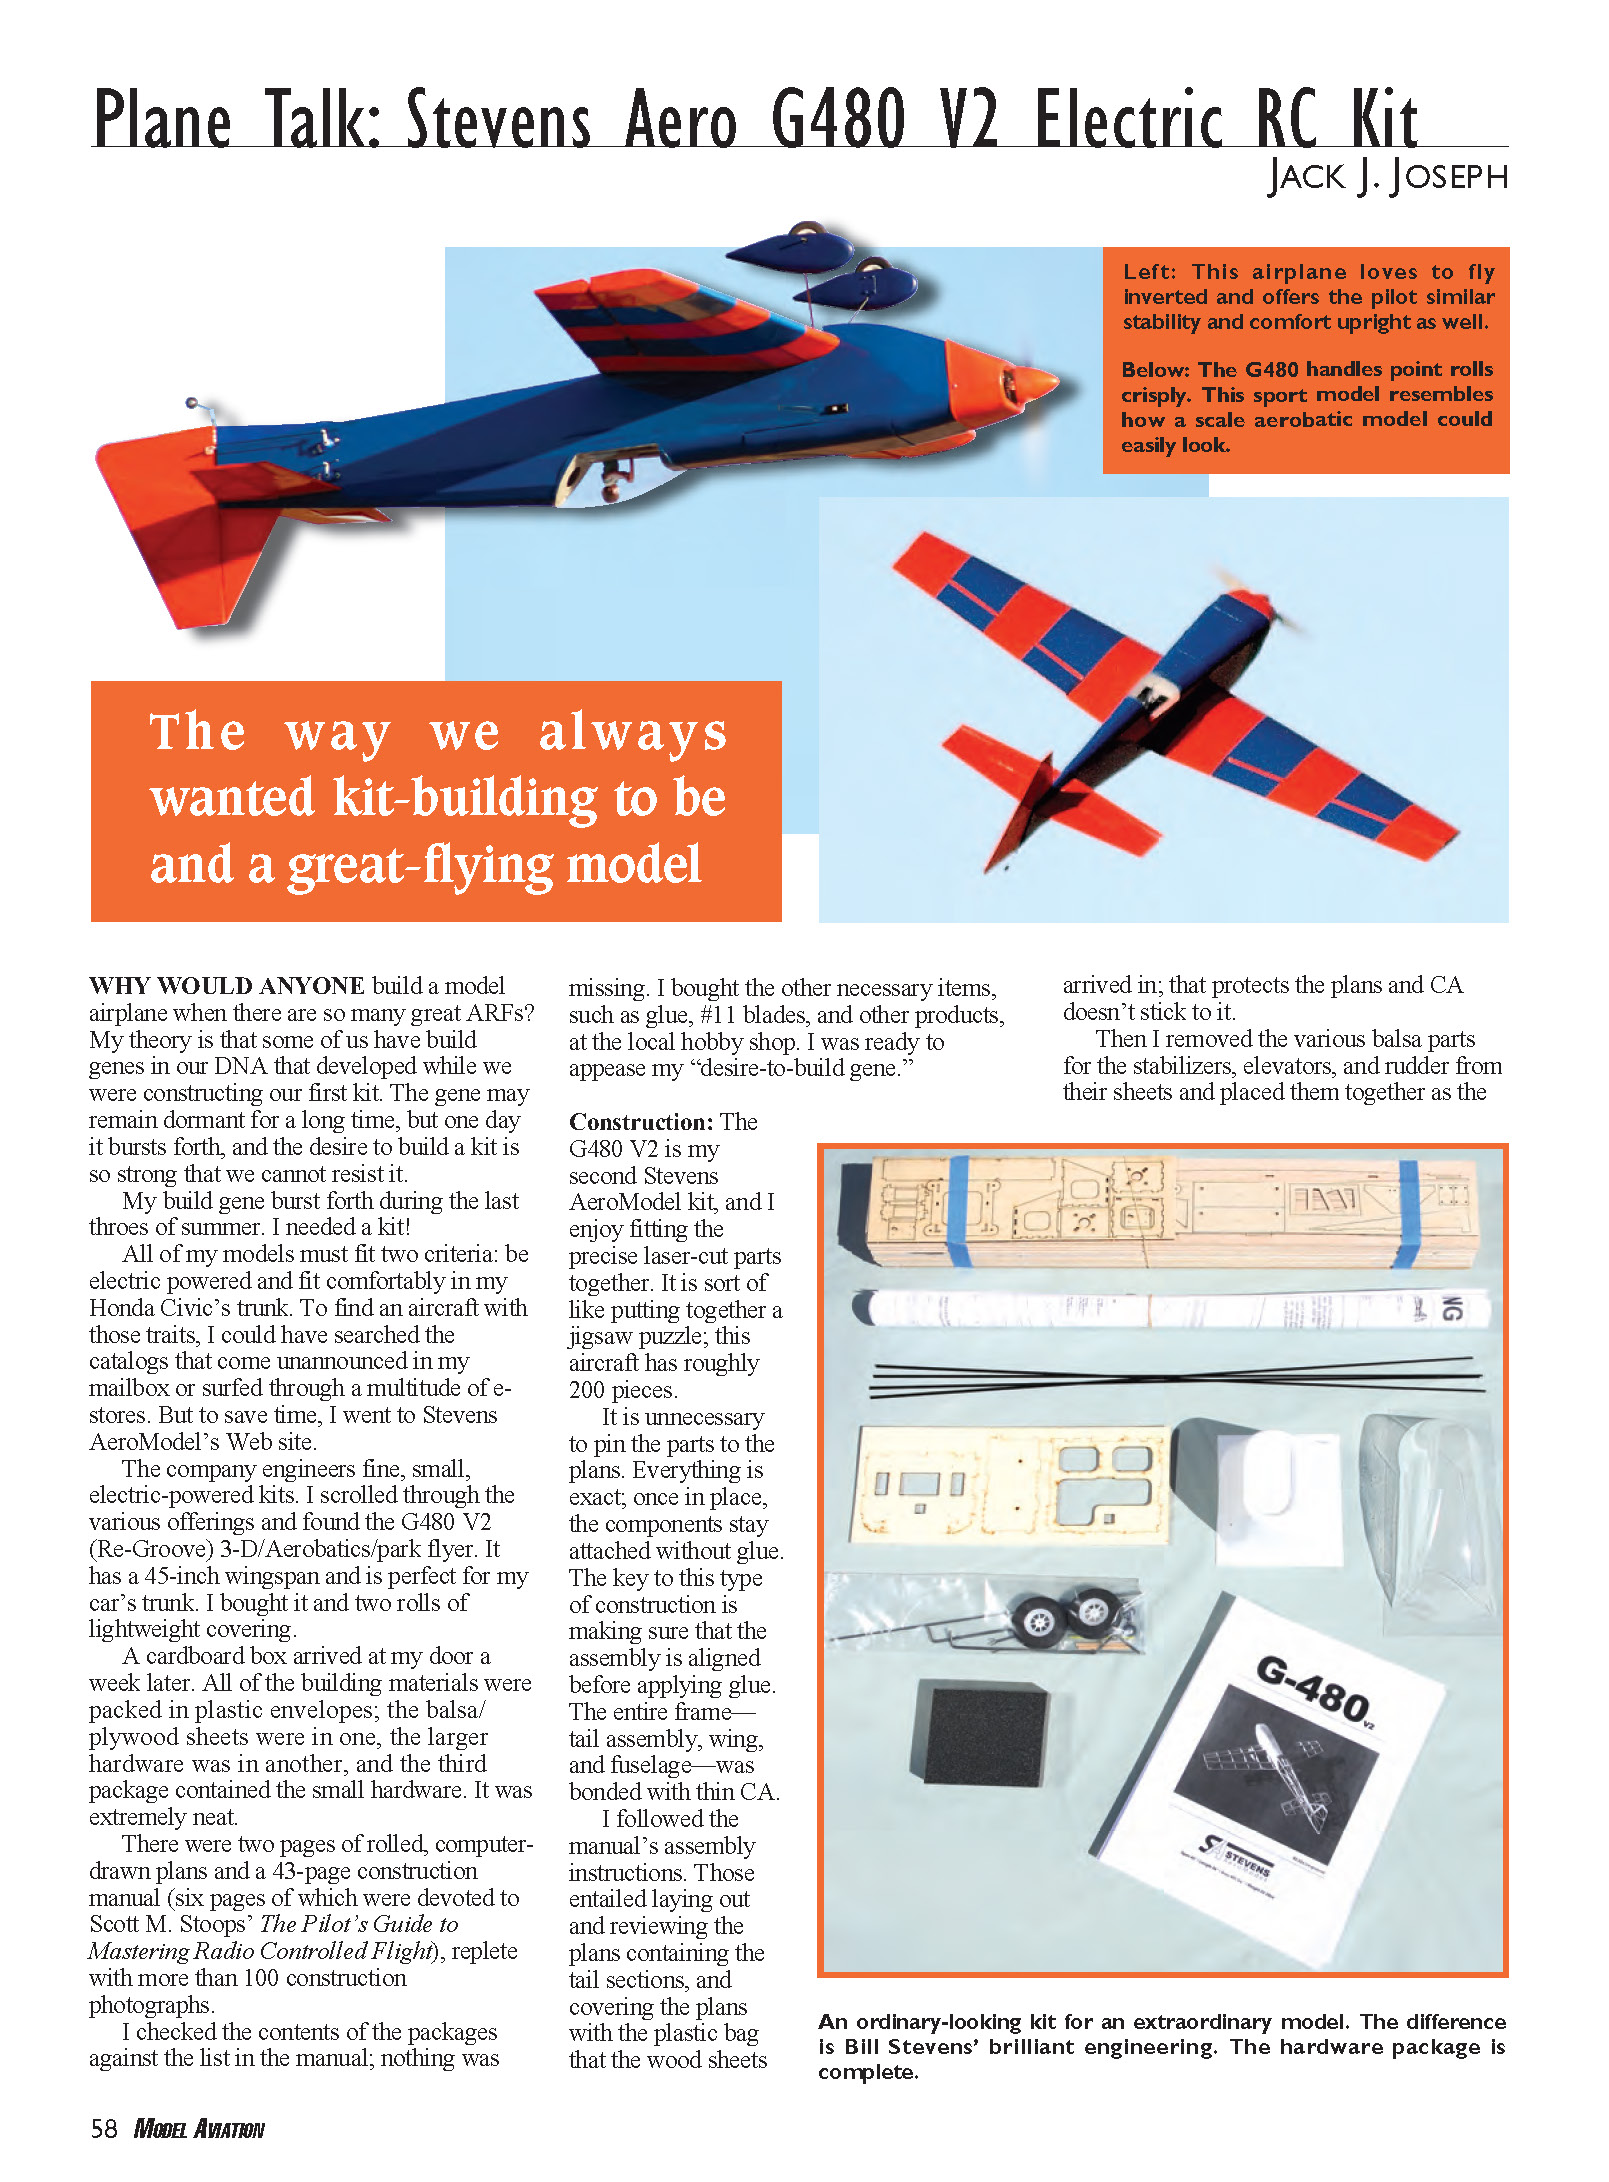
Roy flew the airplane for the photographic session, and then I took control. I found the model to be fast, highly maneuverable, and easy to manage in slow flight. With slight power, landings are a piece of cake. This is a cool airplane!
Conclusion
Building a G480 V2 would test a beginner’s character. A great deal of precision is necessary. Flying should be left to an intermediate or advanced pilot. The airplane is too fast and too maneuverable for a beginner.
If you are looking for a model that can spin around a dime, stand still on its tail, and land like a feather, the G480 is your ticket. It is a cool airplane.
Jack J. Joseph
Manufacturer/Distributor
Stevens AeroModel Box 15347 Colorado Springs, CO 80935 (719) 387-4187 www.stevensaero.com
Sources
- Hacker Brushless Motors — (480) 726-7519 — www.hackerbrushless.com
- Thunder Power Batteries — (702) 228-8883 — www.thunderpowerrc.com
- APC Propellers — (530) 661-0399 — www.apcprop.com
- Castle Creations — (913) 390-6939 — www.castlecreations.com
- Hitec RCD USA — (858) 748-6949 — www.hitecrcd.com
- DecoArt — (800) 367-3047 — www.decoart.com
- Delta Creative — (800) 423-4135 — www.deltacreative.com
- Minwax — (800) 523-9299 — www.minwax.com
- Pacer Industrial — (800) 538-3091 — www.supergluecorp.com/pacer-industrial
Other Published Reviews
- Fly RC: June 2004
Transcribed from original scans by AI. Minor OCR errors may remain.

