
Make "Real-Looking" Rivets
by Roger Carignan
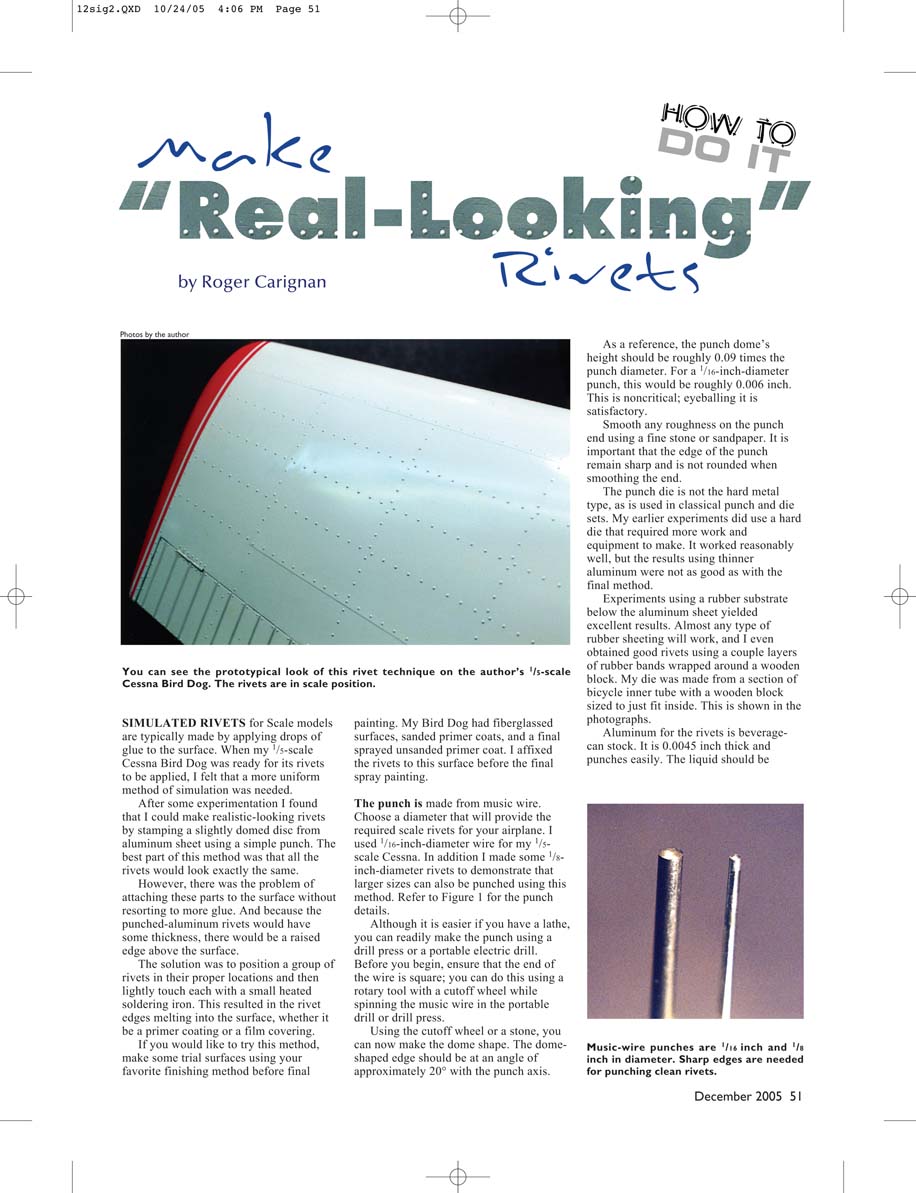
You can see the prototypical look of this rivet technique on the author's 1/5-scale Cessna Bird Dog. The rivets are in scale position.
SIMULATED RIVETS for Scale models are typically made by applying drops of glue to the surface. When my 1/5-scale Cessna Bird Dog was ready for its rivets to be applied, I felt that a more uniform method of simulation was needed.
After some experimentation I found that I could make realistic-looking rivets by stamping a slightly domed disc from aluminum sheet using a simple punch. The best part of this method was that all the rivets would look exactly the same.
However, there was the problem of attaching these parts to the surface without resorting to more glue. And because punched-aluminum rivets would have some thickness, there would be a raised edge above the surface.
The solution was to position a group of rivets in their proper locations and then lightly touch each with a small heated soldering iron. The result is the rivet edges melting into the surface, whether it be a primer coating or a film covering.
If you would like to try this method, make some trial surfaces using your favorite finishing method before final painting. My Bird Dog had fiberglassed surfaces, sanded primer coats, and a final sprayed unsanded primer coat. I affixed the rivets to this surface before the final spray painting.
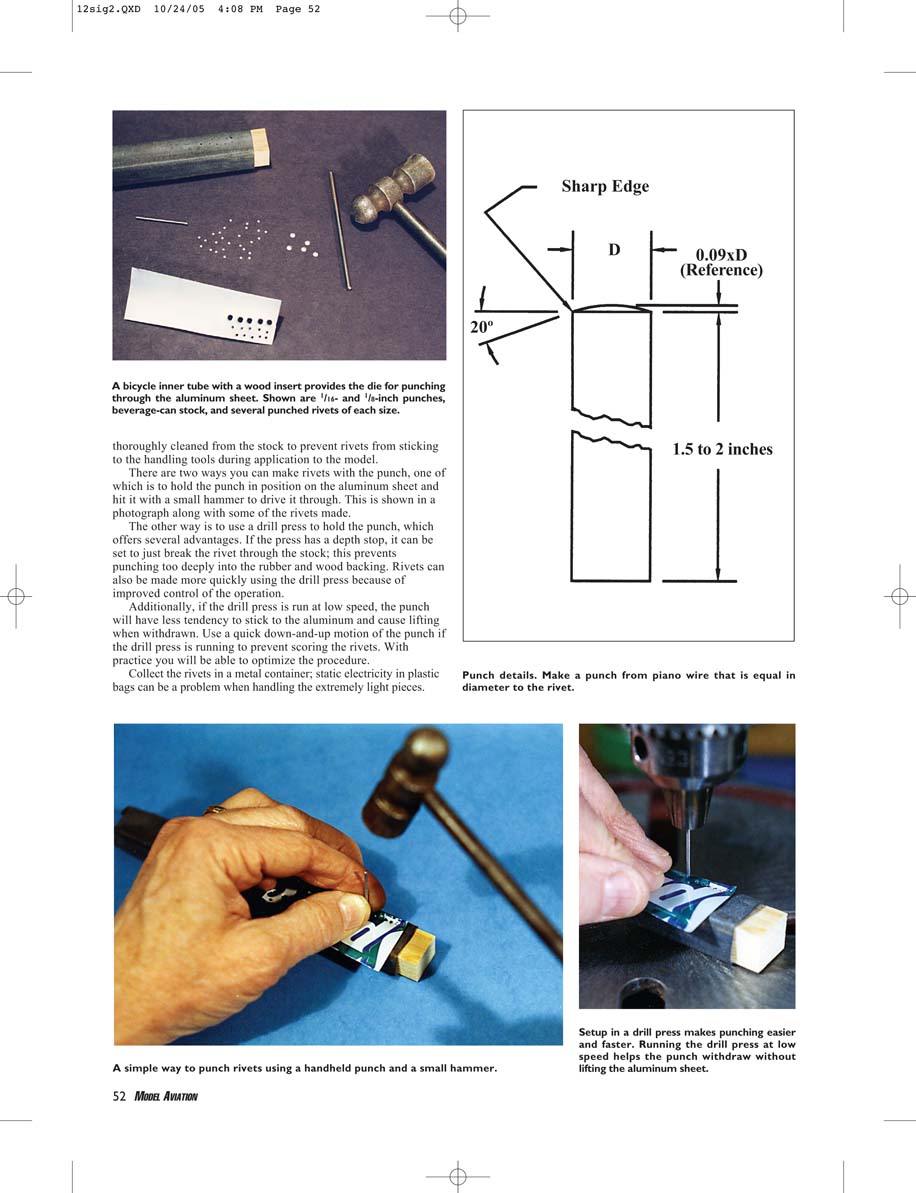
The punch is made from music wire. Choose a diameter that will provide the required scale rivets for your airplane. I used 1/16-inch-diameter wire for my 1/5-scale Cessna. In addition I made some 1/8-inch-diameter rivets to demonstrate that larger sizes can also be punched using this method. Refer to Figure 1 for the punch details.
Although it is easier if you have a lathe, you can readily make the punch using a drill press or a portable electric drill. Before you begin, ensure that the end of the wire is square; you can do this using a rotary tool with a cutoff wheel while spinning the music wire in the portable drill or drill press.
Using the cutoff wheel or a stone, you can now make the dome shape. The dome-shaped edge should be at an angle of approximately 20° with the punch axis.
As a reference, the punch dome's height should be roughly 0.09 times the punch diameter. For a 1/16-inch-diameter punch, this would be roughly 0.006 inch. This is noncritical; eyeballing it is satisfactory.
Smooth any roughness on the punch end using a fine stone or sandpaper. It is important that the edge of the punch remain sharp and is not rounded when smoothing the end.
The punch die is not the hard metal type, as is used in classical punch and die sets. My earlier experiments did use a hard die that required more work and equipment to make. It worked reasonably well, but the results using thinner aluminum were not as good as with the final method.
Experiments using a rubber substrate below the aluminum sheet yielded excellent results. Almost any type of rubber sheeting will work, and I even obtained good rivets using a couple layers of rubber bands wrapped around a wooden block. I made dies from a section of bicycle inner tube with a wooden block sized to just fit inside. This is shown in the photographs.
Aluminum for the rivets is beverage-can stock. It is 0.0045 inch thick and punches easily. The liquid should be flux to help with the soldering step. The rivets can be affixed with a small drop of cyanoacrylate, or positioned and lightly spot-soldered with a fine-tipped, temperature-controlled soldering iron.
Music-wire punches are 1/16 inch and 1/8 inch in diameter. Sharp edges are needed for punching clean rivets. Rivets should be thoroughly cleaned from the stock to prevent rivets from sticking to the handling tools during application to the model.
There are two ways you can make rivets with the punch, one of which is to hold the punch in position on the aluminum sheet and hit it with a small hammer to drive it through. This is shown in a photograph along with some of the rivets made.
The other way is to use a drill press to hold the punch, which offers several advantages. If the press has a depth stop, it can be set to just break the rivet through the stock; this prevents punching too deeply into the rubber and wood backing. Rivets can also be made more quickly using the drill press because of improved control of the operation.
Additionally, if the drill press is run at low speed, the punch will have less tendency to stick to the aluminum and cause lifting when withdrawn. Use a quick down-and-up motion of the punch if the drill press is running to prevent scoring the rivets. With practice you will be able to optimize the procedure.
Collect the rivets in a metal container; static electricity in plastic bags can be a problem when handling the extremely light pieces.
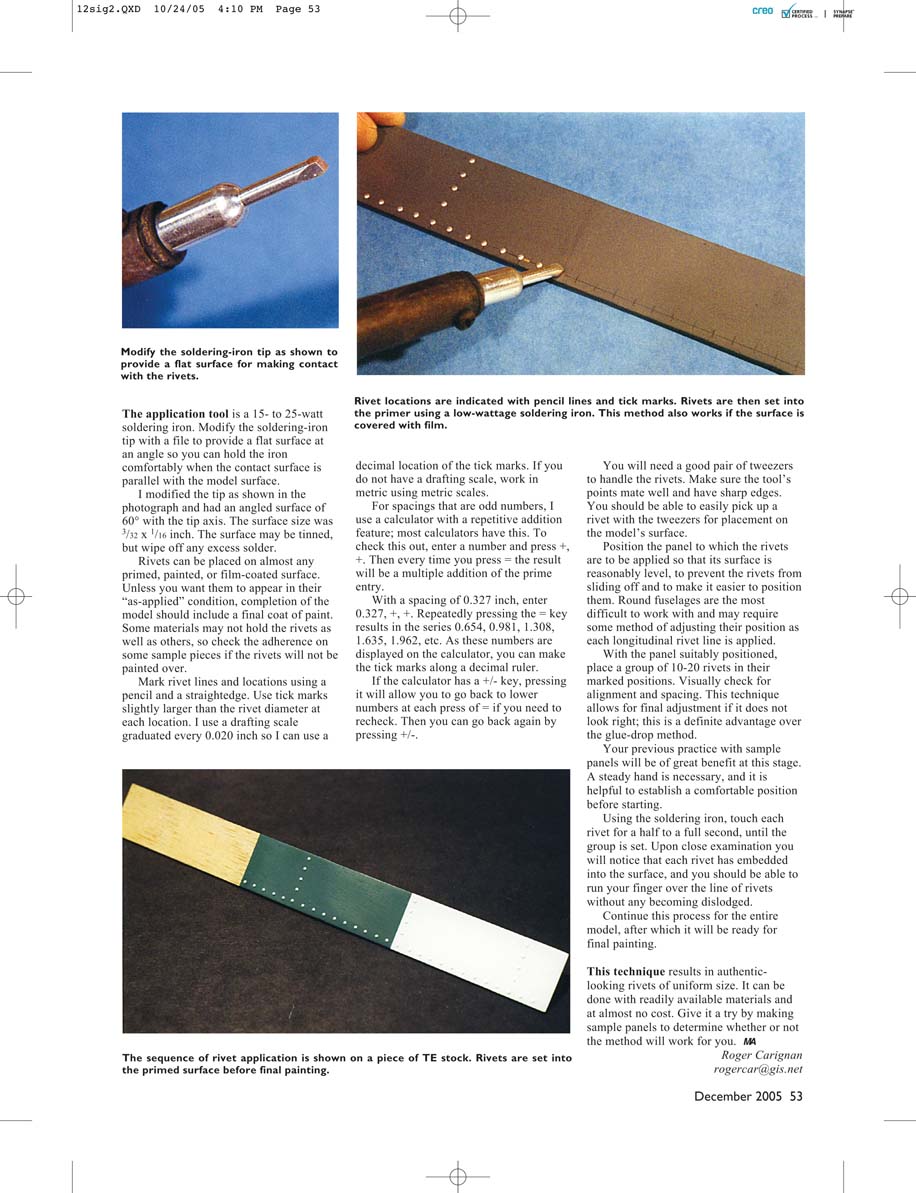
The application tool is a 15- to 25-watt soldering iron. Modify the soldering-iron tip with a file to provide a flat surface at an angle so you can hold the iron comfortably when the contact surface is parallel with the model surface.
I modified the tip as shown in the photograph and had an angled surface of 60° with the tip axis. The surface size was 3/32 x 1/16 inch. The surface may be tinned, but wipe off any excess solder.
Rivets can be placed on almost any primed, painted, or film-coated surface. Unless you want them to appear in their “as-applied” condition, completion of the model should include a final coat of paint. Some materials may not hold the rivets as well as others, so check the adherence on some sample pieces if the rivets will not be painted over.
Mark rivet lines and locations using a pencil and a straightedge. Use tick marks slightly larger than the rivet diameter at each location. I use a drafting scale graduated every 0.020 inch so I can use a decimal location of the tick marks. If you do not have a drafting scale, work in metric using metric scales.
For spacings that are odd numbers, I use a calculator with a repetitive addition feature; most calculators have this. To check this out, enter a number and press +. Then every time you press = the result will be a multiple addition of the prime entry.
With a spacing of 0.327 inch, enter 0.327, +, =. Repeatedly pressing the = key results in the series 0.654, 0.981, 1.308, 1.635, 1.962, etc. As these numbers are displayed on the calculator, you can make pencil tick marks along a decimal ruler.
If the calculator has a +/- key, pressing it will allow you to go back to lower numbers at each press of = if you need to recheck. Then you can go back again by pressing +/-.
You will need a good pair of tweezers to handle the rivets. Make sure the tool’s points mate well and have sharp edges. You should be able to easily pick up a rivet with the tweezers for placement on the model’s surface.
Position the panel to which the rivets are to be applied so that its surface is reasonably level, to prevent the rivets from sliding off and to make it easier to position them. Round fuselages are the most difficult to work with and may require some method of adjusting their position on a panel jig. Adhesives are not normally used; the rivets are positioned, and with a low-wattage soldering iron, each rivet is set by touching it for a fraction of a second.
When the panel is suitably positioned, place a group of 10–20 rivets in their marked positions. Visually check for the correct alignment and spacing. This technique allows for final adjustment if it does not look right; this is a definite advantage over the glue-drop method.
Your previous practice with sample panels will be of great benefit at this stage. A steady hand is necessary, and it is helpful to establish a comfortable position before starting.
Using the soldering iron, touch each rivet for a half to a full second, until the rivet is set. Upon close examination you will notice that each rivet has embedded into the surface, and you should be able to run your finger over the line of rivets without any becoming dislodged.
Continue this process for the entire model, after which it will be ready for final painting.
This technique results in authentic-looking rivets of uniform size. It can be done with readily available materials and at almost no cost. Give it a try by making sample panels to determine whether or not the method will work for you.
Roger Carrignan rogercarr@aigis.net
December 2005
Transcribed from original scans by AI. Minor OCR errors may remain.

